

Tycoon Packaging Artwork Guidelines
Quick Guide about Artwork and Dielines
8 Steps Artwork Process To Get The Best Printing Results
The artwork guidelines cover technical specifications for crafting and submitting artwork for print or digital display. These guidelines help ensure the artwork is of top quality and can be properly displayed. Here is our 8-step artwork process to get the best printing results:

File Formats
Send files in both Adobe Illustrator (AI.) or (PDF.) formats
Color Profiles
The colors must be in the CMYK or PMS color scheme

Text
The text objects should be drawn and sized

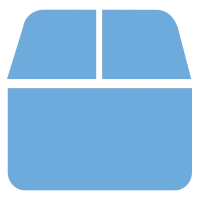
Additional Printing
Make separate layers for printing

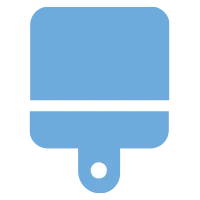
Dielines
Don’t flatten the given dieline template
Lines
All the lines must be 0.25pt thick

Images
Make sure all the images are inserted firmly and properly sized

Graphics
All the graphics must be at least 300 PPI
Important!
To ensure your fastest production time, please make sure all your designs meet our specifications.
How To Make Effective Artwork For Your Packaging?
The packaging artwork is the perfect way to convey your brand. The right art of the packaging can make the difference and enhance the perceived value of your premium product. However, there is a wide variety of factors that are necessary in the creation of effective box designs.
Therefore, it is essential to know what to look for when evaluating potential customers. Here we will cover some of the most important tips and tricks to use Adobe Illustrator in the best possible manner with Tycoon Packaging’s printing service. Get started on your next project today!
File Formats
What file formats do you accept?
We can accept a broad selection of file formats such as .AI, .EPS, .PDF, and .TIF files. We also support other common formats like JPG and PSD to offer convenience.
We can’t receive and accept RGB color mode files with transparency unless these files are exported from Adobe Photoshop. You can also use other software for image editing, which allows you to save and export the file in the same format.
If the artwork is imported from an external source, then it will need to be converted into CMYK/PMS color mode before uploading it here! You are not sure about how this works? Need anything else to know about this process? Feel free to contact us directly through email at support@tycoonpackaging.com.
How do I Save As A PDF file in Adobe Illustrator for HD Print?
To save a file as a PDF in Adobe Illustrator, you need to follow these steps:
- Copy and paste the artwork into Adobe Illustrator.
- Select File > Save As or press Ctrl + S (Windows) or Command + S (Mac OS).
Click on PDF and ensure that all the options are checked for HD printing and precise color.
I Don't Have Adobe Illustrator, What Should I Do?
If you do not have Adobe Illustrator, you can also use Photoshop. You can also use InDesign, Acrobat Pro DC, and CorelDraw as well for artwork. If you are using a version of GIMP (GIMP 2), then it should work just fine!
What Is The Recommended File Size?
The recommended size of the artwork files is between 10-20 MB. If you want to add a brand logo, please make sure it is vector. If the size of the artwork file is large for your printer, try reducing it with a compression tool before printing out your art!
Color Profiles
RGB & CMYK
RGB stands for red, green, and blue. The values of these three colors showcase the intensity of each. CMYK stands for cyan, magenta, and yellow. This refers to how the ink will look when printed on paper. Spot colors appear when parts of an image are highlighted or added later, instead of coming from the original scan.
You need to know whether your file is in RGB or CMYK for printing. This detail is usually shown under Document Information or in settings like File → Document Color Mode. Once you check the profile:
- Switch between RGB and CMYK using color settings in your software.
- For precise output, use the proper color profile and soft‑proof your colors.
- Always test with a printed proof to confirm the colors look right.
How do I change my document to a CMYK color scheme?
To change your document to a CMYK color scheme, you need to follow these steps:
- Select the document.
- Go to the color menu and select the CMYK color scheme.
Can I Print Using RGB color mode?
RGB is not recommended for printing the artwork. But it is better for digital output. However, it will not look good when printed on paper. While CMYK is the best choice for print to produce vibrant colors on the paper.
Why Should I Print in 100% K Value?
You should print at 100% K value if you want a consistent color.
Text Profiles
A text profile is a template to create your artwork for your packaging. Text profiles include all the information, such as product name, price, and size, to print on each box! If you’re new to designing in InDesign or Photoshop, start with a basic text layout.
That way, when we work together — especially as deadlines get close — we’ll understand how everything fits
What is the minimum font size?
Text in all caps must be at least 0.125″ tall. For fonts such as Helvetica Neue or Arial, make it at least 0.150″ tall. If text has descenders, you will need more line height to fit them.
How do I ensure all texts are outlined?
First of all, make sure your text is not rasterized. Then use the outline effect in Adobe Photoshop or Illustrator to turn the text into outlines. The next step is to check that your font family matches the rest of your design.
If the font doesn’t match, spacing may look wrong, or the text may be too small.
Additional Printing Options
Additional printing options include:
- PMS Color Scheme
- Spot UV
- Inkjet Printing
- Varnish
You can also pick different coatings, such as matte, glossy laminate, or UV coating for a splendid look. If you want something extra, we offer laser engraving too. We also have letterpress printing available after full‑color printing.
Can I print using PMS Colors?
PMS is a trademark owned by Pantone, Inc. Only some products can use Spot UV or print with a PMS color scheme. To find out if your product qualifies, please contact customer support.
Is spot UV available on all products?
No. Spot UV is only available on selected products according to your needs, through our packaging company.
How do I prepare files for additional printing options?
If you want to prepare files for additional printing options, consider the following tools:
- Adobe Illustrator (AI)
- Adobe Photoshop (PS)
- Adobe InDesign (ID)
You can use these programs to create custom artwork and export it as a PDF file.
How do I prepare files for inside printing?
Inside print means printing on the inside of your packaging for catchy backdrops. You can print any image directly on the inside of the packaging. Inside printing needs less prep than outside printing and doesn’t need separate layers.
But your files still need some setup. First, layers must overlap properly to ensure nothing gets lost under the press rollers. Second, all text must be aligned neatly along the edges.
Dielines
Dielines are the lines that appear on the outside of a box to show where to cut, fold, and crease the packaging. That is why these lines are called “cut lines.”
What does each color represent on a dieline?
Packaging involves there are a lot of things. If you are shipping a product, the packaging must protect the enclosed items from all potential damage. You can add padding to keep items safe when stacked with complete precision.
The box also needs a label to show what’s packed inside. These labels help customers know the product they are getting. Mail-order companies like UPS and FedEx offer many packaging material options to ensure optimal protection.
Cut Line (Black Lines)
The cut line is the area where the die will cut through the sheet. This is where you should place your artwork, as well as any other areas that may need to be processed later (such as collating). The easiest way to tell if a piece of artwork is within this zone is by looking at it closely: if there are black lines on either side of your artwork, then it’s safe and effective to use them as guides in placing your artwork onto your packaging material.
The best way to keep track of how much space should be between each line is with an invisible grid or ruler tool like those made by Mitutoyo Corp., which provides precise measurements up to 0.25mm away from its edge.
Crease Line (Red Lines)
The crease line is the line that shows where the fold will be. It’s usually thicker than other lines, and its color can vary from red to black depending on what it’s used for.
The crease line can be used as a design element in your packaging artwork, but you’ll want to consider how much space you’ll have before adding any text or images down below the fold.
Bleed Line (Green Lines)
The bleed line shows where the printer will cut your packaging design. It is outside the final print area and helps guide trimming boxes or labels. It extends about 0.25 inch beyond your artwork edge to avoid overlap.
Safety Margin (Dotted Green Lines)
The safety margin is the distance between the box edge and your artwork. It prevents unwanted bleeding to avoid product damage or injury during shipping. The minimum safety margin is 0.125 inches based on the artwork’s size.
Perforation (Dotted Black Lines)
Perforation is a hole in the paper that makes it easy for the users to separate the packaging into sections. This can be used to create tear-off tabs, windows for labels, and other purposes.
Can I make changes to the guidelines?
You can change the dimensions of the packaging, but you must re-save the file. After saving, ensure no other lines are lost or overwritten. If you lack access to Adobe Illustrator or similar tools, consider using free alternatives like Inkscape.
Can I flatten the dieline layer with my artwork layer?
Flattening the dieline and artwork layers is a great way to create clean edges. It helps smooth pixelated areas. However, it may cause unwanted artifacts. If you want bleed-through effects, there are ways to achieve them.
Lines
- Minimum line width: 0.1 mm
- Minimum line spacing: 0.1 mm
- Minimum line weight: 0.1 mm (example excludes white space)
- Maximum length of lines in one direction is 500 pixels; maximum length in the other direction is 350 pixels.
- Lines should be drawn with a 90-degree angle at their ends and have no gap between them when viewed from above or below.
What is the minimum thickness for all strokes and thin lines?
The minimum thickness for all strokes and thin lines is 0.01 pixels. If you have a stroke with a thickness of 0.02 px, then it will be considered as two separate strokes.
Images
- Use the RGB color space.
- Use CMYK color space.
- Use vector graphics for box design. They are more flexible than raster images. If you’re not skilled at creating vector art, consider hiring a professional. Avoid using low-resolution images. Ensure your box design is smooth and clean, especially for logos on labels inside the box.
- Make sure the typeface used matches what’s in your logo file—you’ll want something legible when scanning barcodes at checkout lanes!
How do I embed all my images?
To embed images in your box, you need to follow these steps:
- Go to the “Embed Images” feature. Make sure you are using the right image format, size, and quality!
- Click “Add Image(s).” This will open up another window where you can choose which image(s) to add to your box design.
- Click OK when done selecting all of them!
How do I check the image properties in Adobe Illustrator?
- Open the image in Adobe Illustrator and select the File menu, then select Document Properties.
- On the summary tab, check to see if your resolution and color mode are correct. If not, make sure that you’re using RGB or CMYK for your print settings with this particular file format before proceeding further.
How do I know if the image quality is 300 PPI?
If you print artwork at 300 PPI, using a printer with built-in anti-aliasing improves quality. Anti-aliasing smooths jagged edges in images. If your printer lacks this feature, use Photoshop or Illustrator to check the design before printing.
How do I check if my images are in the CMYK color space?
- Open your image in Adobe Illustrator
- Select the color picker tool from the toolbar
- Hold down shift, click on a color in your image, and you’ll see the RGB values of that color.
Graphics
The graphics you use in your packaging artwork should be high resolution and designed with the appropriate color space.
Should I prepare my graphics in image or vector form?
Vector graphics are best for logos, text, and other artwork that you plan to scale to different sizes. Vector graphics are scalable without loss of quality.
How do I know if the image quality is 300 PPI?
- The resolution of your image should be 300 PPI (pixels per inch).
- If you upload a resolution lower than 300 PPI, we will automatically scale down the size of your artwork to match.
- Image quality is based on how many pixels are in an area and how large that area is.
Still Have Questions?
If you have any questions, worry not. We have got you covered. Feel free to contact us directly. We are happy to help you with your project!
We Collaborate With People and Brands
We have a team of expert designers, developers, and consultants who work together to create packaging artwork that is aesthetically pleasing and functional. We work with leading brands such as technology, consumer goods, the retail industry, and much more.
Let’s Build Something Great Together!
Our team of expert designers, experienced packaging team, and knowledgeable marketers has a lot of experience to help you build something great. We know and understand what works and what doesn’t work when it comes to packaging design, packaging development, and marketing.
Need Help? Call Our Team At +1 646 814 7172
Need Help with Tycoon Packaging Consultant? We’re here! We offer a variety of packaging options, from sustainable choices to personalize packaging, all aimed at helping your product stand out. And with our fast turnaround, you can get started without the wait.